
What supplies are needed to start beading?
If you want to start making jewelry or crafts with seed beads, you may be wondering what supplies you'll need. So I created a list of some of the most essential beading supplies you'll need to get started along with descriptions of each.
However, you won't need all of these beading supplies for all projects. In fact, there are lots of projects you can create with just beads, thread, a needle, and scissors, such as these beaded rings. I highly recommend starting with simple projects like these.
For more information about getting started with seed beads, I highly recommend checking out my beginner's guide.
-

Beads
The most essentials supplies you will need is beads. If you are bead weaving, using beads that are uniform in size and shape are crucial. Otherwise, the beads won't align and your designs will be wonky. This is why I personally only use and sell Miyuki seed beads. Not only are they the most uniform, they are also the most color stable. Cheap beads from the hobby shop or Amazon often chip and peel as soon as you start handling them. It's just not worth it in my opinion. However, if you're just stringing beads, a little variation in size and shape can add charm in my opinion. And I love Czech glass seed beads for this. They are great quality, but a little less uniform than Miyuki. To learn more about seed beads, check out this article. I also have an article on choosing bead colors here. And you can find a list of online bead shops that sell quality seed beads here.
-
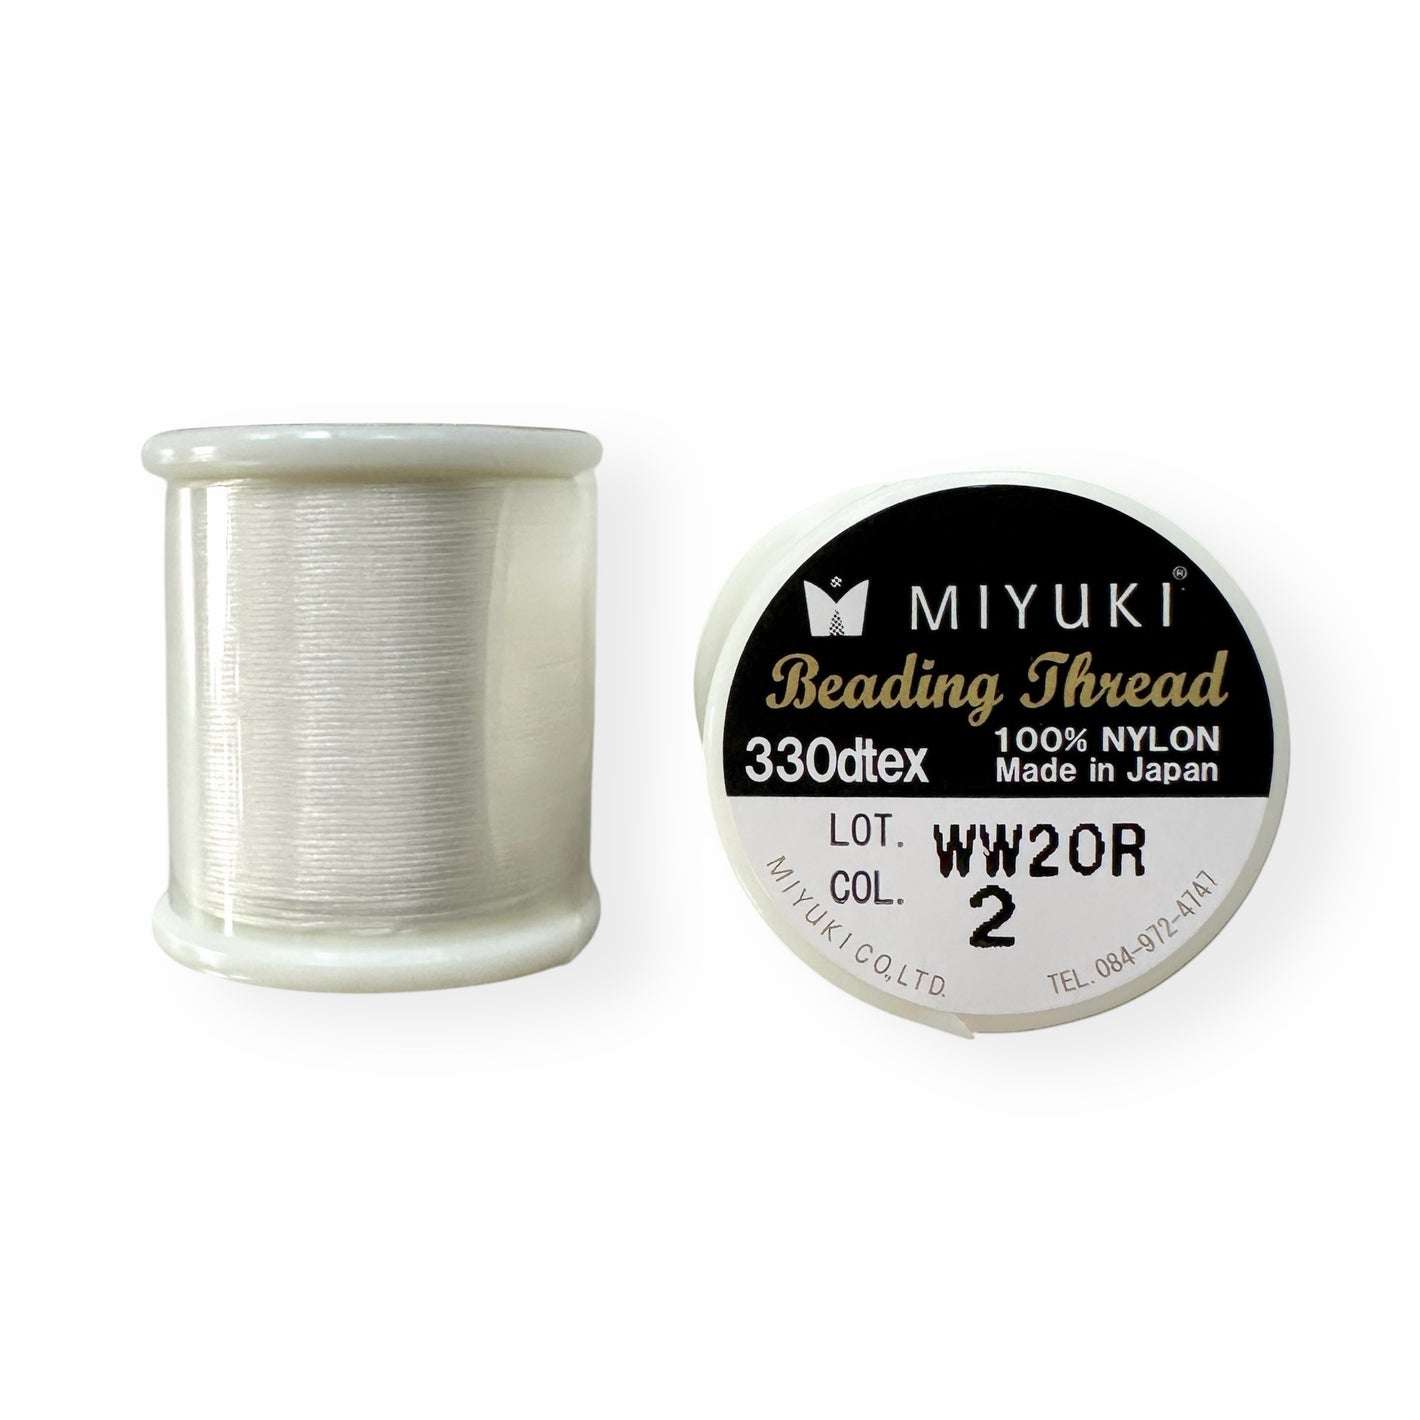
Beading Thread
If bead weaving is something you are interested in, then you will need beading thread. There are two main types - nylon and thermally bonded. You can use nylon beading thread for virtually all types of bead weaving. But most experienced bead artists use a combination of both. For the best results, I recommend starting with a high quality brand of thread. It will be much easier to work with and tangle less. My favorite brand is Miyuki nylon beading thread. To learn more about beading thread and which you should use, I recommend reading this article.
-

Thermally Bonded Thread
Thermally bonded thread is more rigid and won't fray. It's great for when you need more structure. I personally use thermally bonded beading thread for almost all projects except beaded fringe because I want my fringe have movement. My favorite brand of thermally bonded thread is FireLine, but there are other good options, such as WildFire. You can learn more about them here.
-

Beading Wire
If you plan to simply string beads to make bracelets and necklaces, you're going to need beading wire. It's made with multiple thin strands of stainless steel fused together. It then has a thin coating of nylon to make it flexibile and give it a better feel. The higher the strands, the better drape your pieces will have. When working with tiny seed beads, I recommend 49-strand. In terms of diameter, it depends on the size of the hole of the beads you're working with. Make sure the diameter of the beading wire is smaller than the size of the bead hole. My favorite brand is Accu-Flex. You can learn more about beading wire here.
-

Stretch Cord
Stretch cord is used to make stretchy bracelets without a clasp, which are very popular for kids and adults alike. For size 11/0 seed beads, I use 0.7 mm cord. For large seed beads (8/0 and 6/0), I use 1 mm cord. There are lots of good brands out there. I personally have used and loved Stretch Magic. If you plan to make stretch bracelets, I recommend testing out a few and sticking with the one that works best for you. You can learn more about stretch cord here.
-

Craft Wire
Craft wire is used to wire-wrap seed beads around hoops or other types of frames, such as this fun wire-wrapped hoops project that's great for beginners. I have found that the 26 gauge craft wire works best for this purpose. You can learn more about craft wire here.
-

Beading Needles
When bead weaving with small seed beads, you will need to use a beading needle. The most common size of beading needles for bead weaving are 10 and 12. The higher the number, the smaller the eye. Therefore, you would use a higher number (12) with smaller beads because the beads have a smaller hole size and vice versa. I use size 10 with size 11/0 and larger seed beads. And size 12 with 11/0 or smaller 15/0 seed beads. The size you choose also depends on how many times you plan to pass your needle through the bead hole. With all that being said, it's good to have both sizes on hand.
-

Tools
The basic jewelry making tools you will need to get started include chain nose pliers, round nose pliers, flat nose pliers, and flush cutters. These essentials are often sold as sets, but you can purchase them individually.
-

Scissors or Thread Cutter
You don't need anything fancy for cutting your thread. But I do recommend starting with a fresh, sharp pair of scissors or thread cutters to get a nice clean cut on your thread. This will make it much easier to thread your needle. I also recommend having a designated pair of scissors or cutters just for thread so that the blades remain sharp.
-

Thread Conditioner
Conditioning your thread with beeswax reduces tangles and fraying. It can also help with tension. However, one of the reasons why I love Miyuki beading thread so much is that it comes pre-conditioned. Therefore, I personally don't condition it with beeswax before use. However, some people still do. Also, if you're using a nylon beading thread that is not pre-conditioned, such as Nymo, I highly recommend conditioning it. And this simple entails running the thread through the wax to give it a gentle coating.
-

Glue
You may need glue to secure knots or cord ends. I use two types of glue with beading. (1) Gel super glue, which has an extra thick consistency that won't run or drip. It also dries quick, but you have a little more time to adjust that traditional super glue. There are a variety of brands available. My favorites are Loctite and Zap Jewelry Gel. (2) G-S Hypo Cement. This glue comes with a precision tip, which makes it easy to apply in small amounts. It also takes a longer time to dry than gel super glue when you need more flexibility.
-

Beading Mat
This is not a necessity, but it sure is nice to have. When working with small beads, it's best to lay them out on a soft surface that will prevent the beads from rolling as well as sticking. This way you can pick them up easily with your needle. Beading mats are designed specifically for this purpose and the material used doesn't shed or get stuck in your needle. I personally love the non-slip beading mats from The Bead Smith that is shown in the photo. It has a non-slip backing that keeps it in place while working.
-

Bead Scoops
Bead scoops are also not necessary, but they are handy and not expensive. I use mine all day long. They help easily scoop up beads on your beading mat or work surface and return them to their container once you're finished. If you don't want to purchase a bead scoop, you could use a piece of folded paper or the lid to a small jewelry box.
-

Ear Wires
To turn your beaded creations into wearable jewelry, you will need a variety of components called jewelry findings. The type of findings you need depends on what you're making. If you're making earrings, you will need some type of earring findings. The most common is ear wires. They come in many different styles, but they all have a little loop to hook onto your designs. I recommend starting with affordable high quality plated options or stainless steel. Sterling silver and gold-filled options are also available. For the most sensitive ears, Niobium is a great option.
-

Thread/Wire Guards
When making beaded earrings, you can either make a loop with beads and attach the ear wires to the loop or you can use wire guards as shown in the photo. One is not better than the other. It comes down to the look you're going for and personal preference. Thread guards are also used to finish bracelets and necklaces made with beading wire, which is why they are often referred to as wire guards. They look professional and help protect the wire from fraying over time. You can purchase quality gold and silver-plated thread guards in large quantities. Sterling silver and gold-filled options are also available.
-

Clasps
If you're making bracelets or necklaces, you'll need some type of clasp and something to hook the clasp to. There are many different options available. Two of the most common are lobster clasps and less expensive spring rings. If you're using beading wire, you will also need crimp beads and covers, crimp end caps, or clamshells to attach the clasp.
-

Jump Rings
Jump rings are used in jewelry making to connect various components, such as charms, chains, and clasps. If using as a hook for a clasp, I recommend using closed jump rings. Open jump rings are used to connect components with closed loops.
-

Frames/Links/Connectors
These are not essential, but many people starting out struggle to find these components. They are often used to attach beads to create earrings. They are usually sold under the following names: bead frames, links, or connectors. I currently offer round beading frames in gold and silver here.


